trimolD vase

I created this illustration of the mug that I am going to create out of clay. It portrays a floral garden of flowers and grass & leaves. I am going to use circular balls as the 3 base legs.
Inspired artist Post
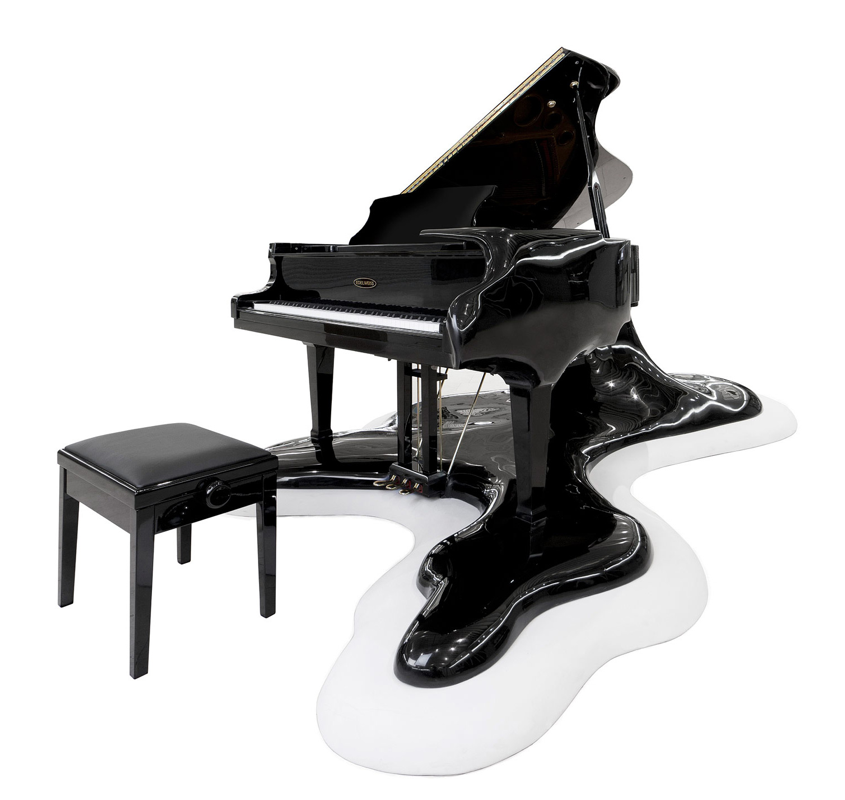
Nina Saunders is a Danish artist who creates sculptures. Her work usually involve secondhand furniture like armchairs and love seats, with the occasional melting piano thrown into her multi-media practice. Floral fabrics run from chair to floor, seeming as if it is leaking and turning into a liquid.
Nina has her own website !! http://www.ninasaunders.eu/
I first was introduced to her work in Art 1.. and ever since her sculptures seem to intrigue me. I love the way she takes old furniture and transforms it into a new beauty. The idea of the pieces of furniture running down to the floor like a liquid is very cool to me. Recreating these pieces would be awesome.

Paper sculpture
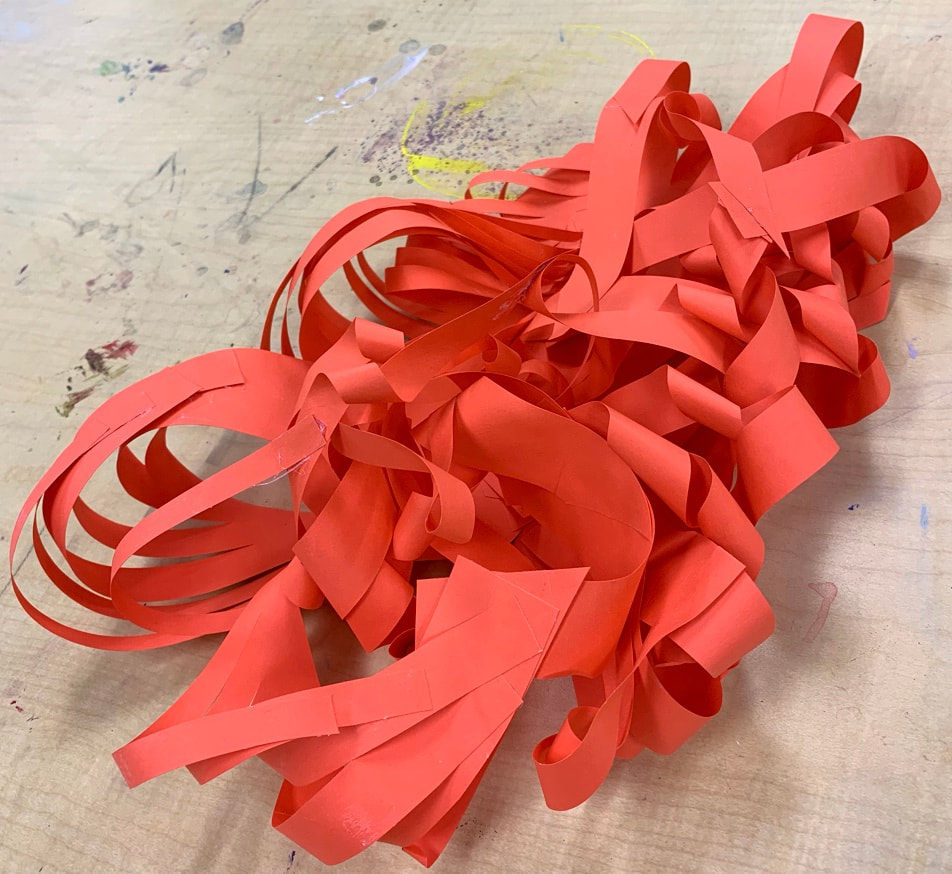
I found it difficult to make the whole piece of paper fit into the technique of the sculpture I was making. I had to cut the whole paper into strips leading to the center and that was tricky because the paper wasn’t even on all sides, it was a rectangle. I found my technique to be successful however because it tends to look better doing the same thing to each strand of the paper. Twisting them or looping them and then continue the pattern.
TRIPOD MUG


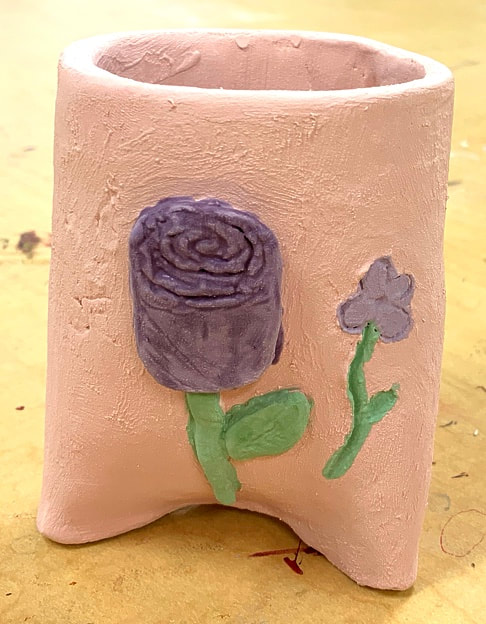
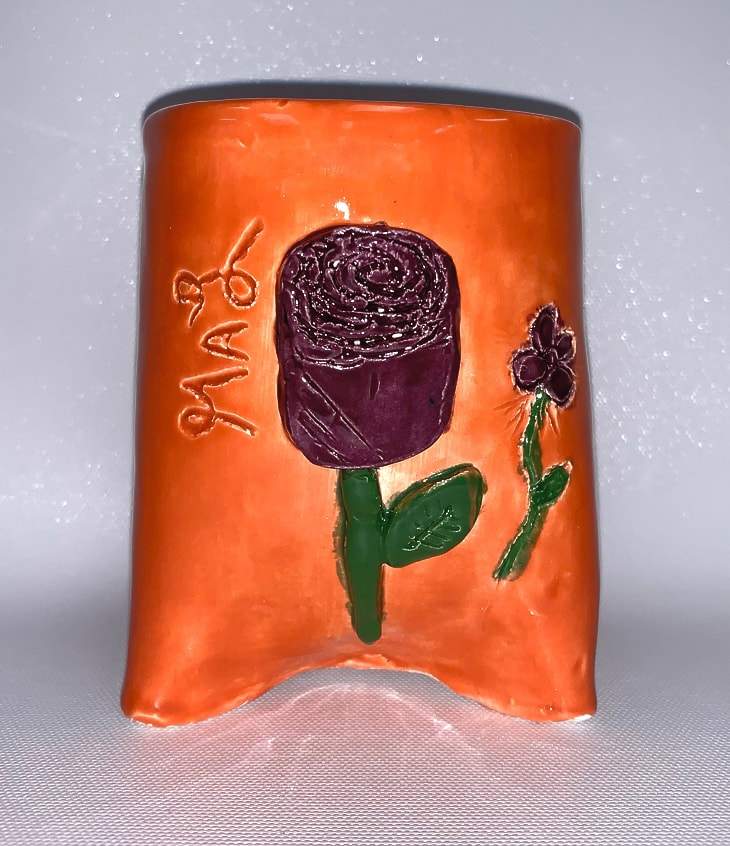
•MAKEUP BRUSH HOLDER•
I chose to create a makeup brush holder for this tripod mug project. I used a theme of flowers for my design.
I chose to create a makeup brush holder for this tripod mug project. I used a theme of flowers for my design.
The process of this piece was to cut a slab of clay in the correct size that I needed. Then I proceeded by folding it into a cylinder shape & forming the 3 “feet” on the bottom. After my piece had its feet and stood on its own, I smoothed out the edges and made it look nice. I then created a rose out of extra clay and scored & slipped it on, with the stem & leaves. I then carved out extra flowers on the piece & added my name into it. After everything looked nice I picked out the colors I wanted it & glazed it. I made sure to add layers so that it was nice and vibrant and not splotchy.
I chose to not add a handle onto my piece because it wasn’t something that I was going to drink out of. This piece is used as storage to display my makeup brushes in my room on my vanity.
I find my shape & design to be successful. I spent my time to smooth it out and make it look even on all sides. To make my piece better, I think I could have added a lot more flowers around the outside. More flowers would have made the piece look more professional and put together.
Definition of clay slab : a clay slab is technique in which clay is rolled into thin sheets and manipulated into shapes.
pit fire
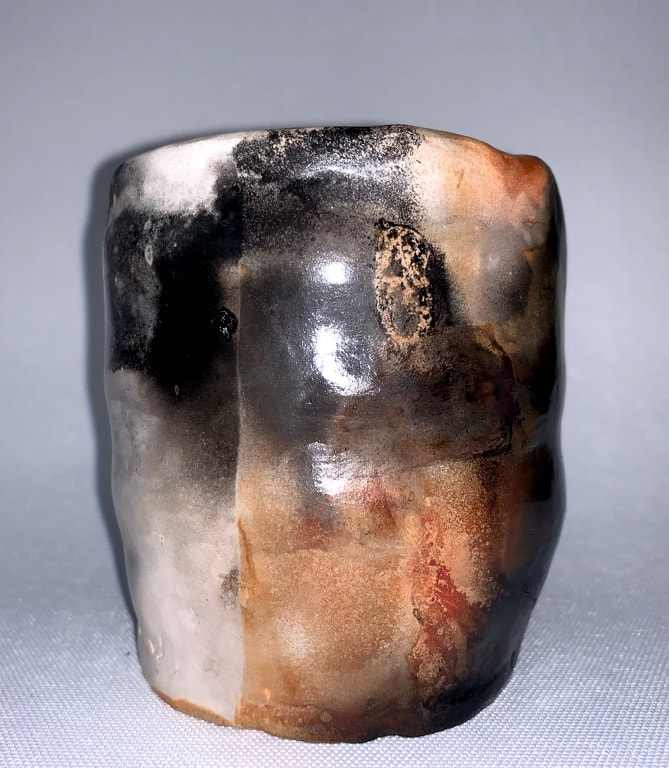
The process of pit fire is pretty cool. First you create rolled out pieces of clay that look like worms. Then you score and slip them together making the shape go outwords in a kind of round shape. After you get your desired shape you then smooth it out. When it is time to fire your pieces you choose items that will create different colors on your piece, like hair or bones. You then proceed by wrapping your piece up with the items where you want the color to burn onto it, and fire it !
I think my piece was successful because of the smoothness of the shape & the beautiful colors that appeared. Honestly, I didn’t bring in any items to fire it with, and I didn’t do anything except form the shape I wanted. My piece burned the way it did because of the other burning items around it from other pieces. This is crazy to me because my piece turned out to be one of the best outcomes.
paper mache
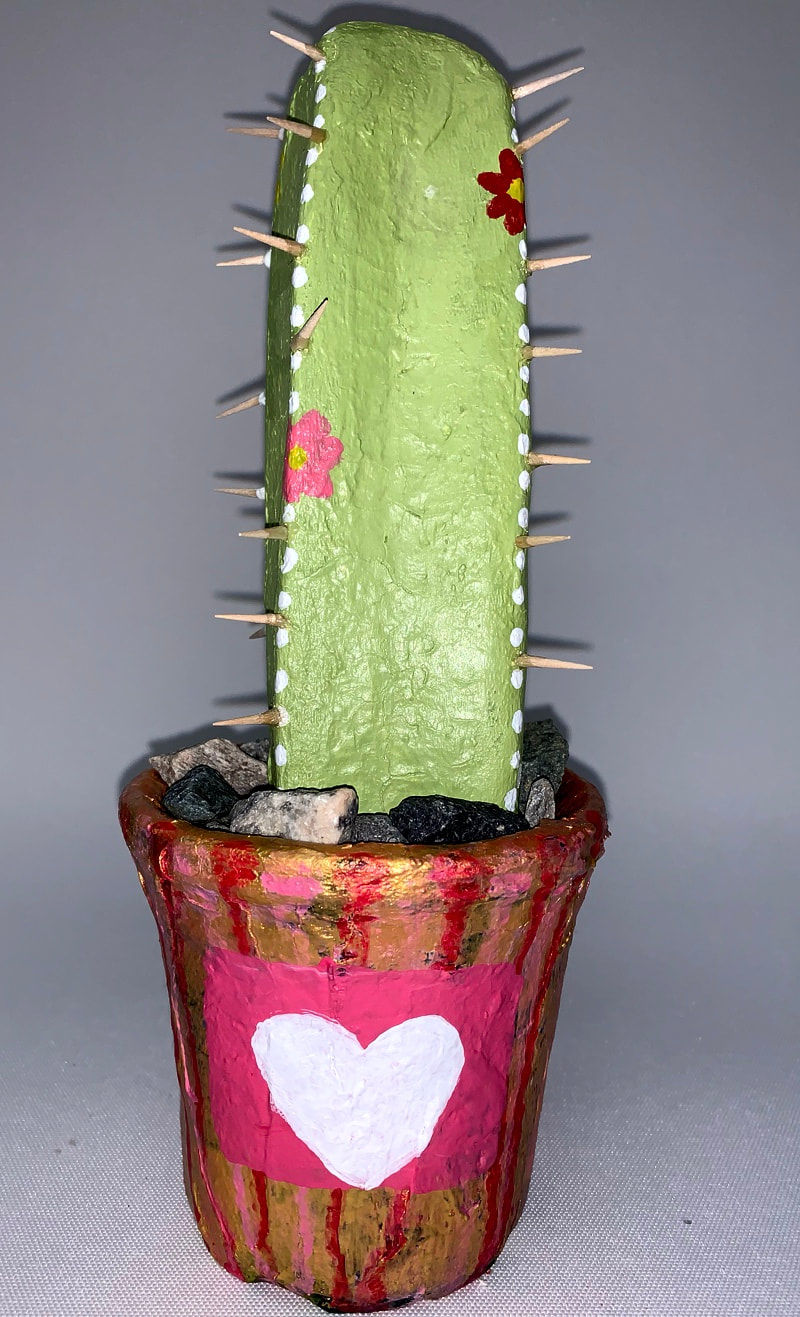
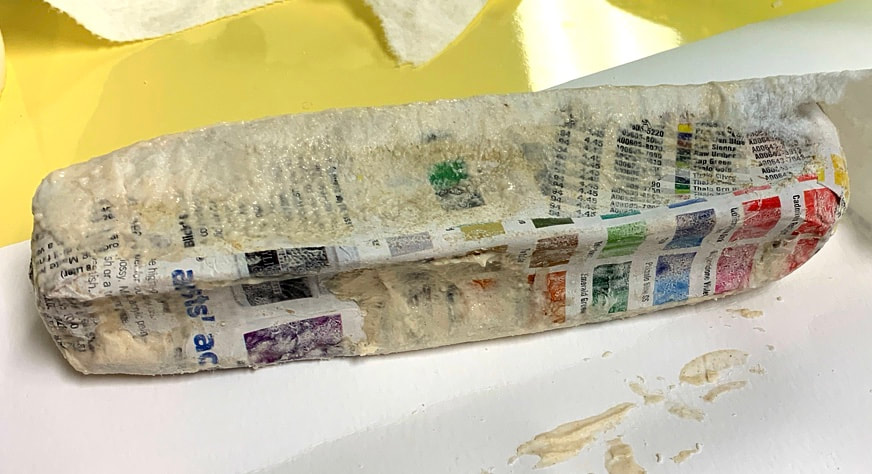
The process of paper mache is pretty simple. First you create the shape of the object you want to make. Then you make a mixture of flour and water in a pancake mix type texture. You then take pieces of newspaper or magazine paper & you dip it into your flour mixture. The next step is to place the pieces of coated paper & place them on your shape in multiple layers until it hardens and is stiff. After this is all finished you put a layer of no textured paper towels on top. After it is smoothe, you then paint your sculpture.
I believe my piece was successful because it looks mostly realistic. I love my final design with the real rocks in the pot & the toothpicks glued to it looking like the thorns.
Some diffuculties that occurred for me during this project was the paper towel layer. It was hard getting it smooth and to stick well. After I finished this part the painting was smooth sailing from there.
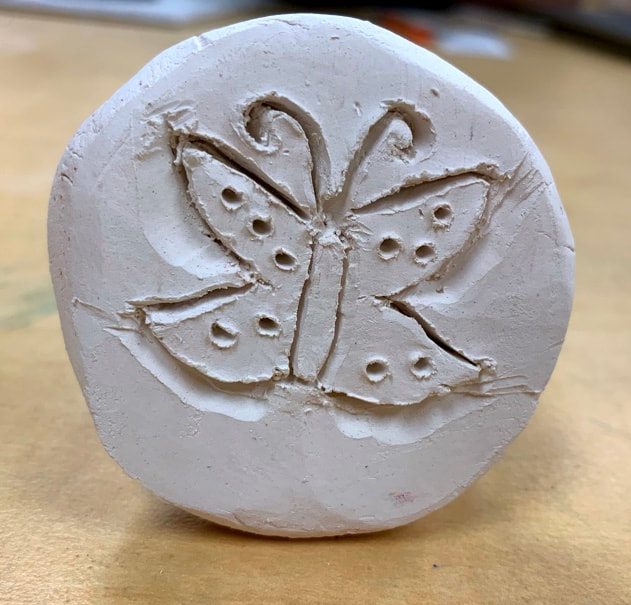
clay stamp